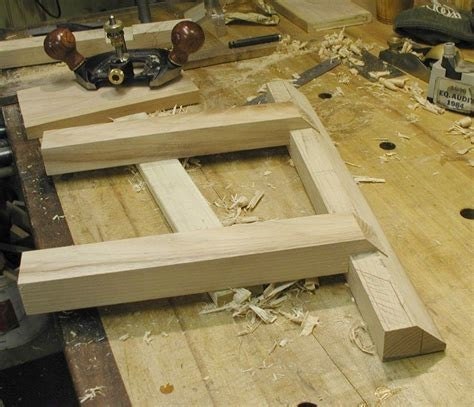
When it comes to crafting stunning and durable furniture or décor, the assembly stage is where magic happens. It’s the phase where individual components come together to form a cohesive masterpiece.
But let’s face it—assembly can also be daunting without a plan. Whether you’re a seasoned craftsman or a hobbyist, this comprehensive checklist will guide you through the process, ensuring your project is as structurally sound as it is visually striking.
Step 1: Dry Fitting – The No-Commitment Trial Run
Think of dry fitting as your dress rehearsal before the big day. It’s your opportunity to piece everything together without glue or fasteners and see how well everything aligns.
Why It Matters
- Visual Alignment: Ensures the design looks as good in reality as it does on paper.
- Structural Integrity: Exposes gaps, misalignments, or potential weak points.
- Adjustment Flexibility: Allows you to tweak or trim components without irreversible mistakes.
How to Do It
- Assemble Without Adhesive: Position all components in their intended spots. For intricate builds, work section by section.
- Clamp Temporarily: Use clamps to simulate the final assembly and evaluate stability.
- Inspect Closely:
- Check joints for tight fits.
- Look for gaps or uneven edges that may need sanding.
- Mark Adjustments: Use a pencil to note problem areas.
💡 Pro Tip: Take photos or jot down notes during the dry fit to streamline the final assembly process.
Step 2: Measure Twice, Cut Once – Precision Is Key
One inaccurate cut can derail an entire project. Double-checking measurements might feel repetitive, but it’s the golden rule for crafting pieces that last.
Why It Matters
- Prevents costly mistakes.
- Ensures proper fit and alignment.
- Reduces wasted materials and effort.
How to Ensure Accuracy
- Double-Check Plans: Verify dimensions against your project blueprint.
- Confirm During Dry Fit: Compare actual components to the design before cutting or joining.
- Use the Right Tools:
- A combination square for right angles.
- A tape measure for consistent dimensions.
💡 Pro Tip: Test cuts on scrap material before committing to expensive pieces.
Step 3: Alignment – The Secret to Professional Results
Properly aligned edges and corners can make the difference between amateur and professional-grade work.
Why It Matters
- Structural Integrity: Misaligned joints lead to wobbly, unstable furniture.
- Aesthetic Appeal: Crooked edges disrupt symmetry and visual harmony.
How to Perfect Alignment
- Use Alignment Tools:
- Squares to ensure precise 90° angles.
- Straight edges to confirm long lines are level.
- Secure with Clamps: Keep everything in place while fastening or gluing.
- Fine-Tune as Needed:
- Tap pieces gently with a rubber mallet.
- Sand edges for a flush fit.
💡 Pro Tip: Add protective pads between clamps and wood surfaces to avoid dents or scratches.
Step 4: Equip Yourself with the Right Tools
Having the right tools isn’t just convenient—it’s essential for accuracy and efficiency.
Must-Have Tools
- Clamps: From bar clamps to corner clamps, these hold pieces in place securely.
- Squares: Ensure perfect 90° angles.
- Tape Measure: Consistency is everything.
- Rubber Mallet: Makes adjustments without damaging surfaces.
- Sanding Tools: Achieve a polished fit and finish.
- Tack Cloth: Removes debris before applying finishes.
💡 Pro Tip: Invest in high-quality tools—they’re worth their weight in gold for long-term projects.
Step 5: Identify and Fix Issues Before Final Assembly
The assembly phase is your last chance to address any flaws before everything is locked into place.
Common Issues to Watch For
- Misaligned Joints: Can weaken the structure and ruin aesthetics.
- Gaps: Impact both strength and appearance.
- Defective Materials: Warped or twisted boards should be replaced.
How to Resolve Them
- Sand or trim edges for a better fit.
- Use wood fillers for minor gaps in non-load-bearing joints.
- Replace defective components early to avoid headaches later.
💡 Pro Tip: Thoroughly inspect each component during the dry fit to catch these issues early.
Step 6: Balancing Beauty and Durability
A truly exceptional piece isn’t just sturdy—it’s also visually stunning.
Achieve Balance
- Structural Balance: Distribute weight evenly to prevent tipping.
- Visual Balance: Align wood grain patterns and ensure symmetry.
Focus on Durability
- Use high-quality materials for load-bearing components.
- Reinforce joints with dowels, biscuits, or screws.
Finish Strong
- Sand surfaces with fine-grit sandpaper for a smooth, polished look.
- Clean thoroughly with a tack cloth to remove dust before applying finishes.
Conclusion: Craft Your Masterpiece with Confidence
Assembly is where vision meets reality, and it’s your chance to create something truly special. By following this checklist—dry fitting, measuring with precision, aligning carefully, and using the right tools—you’ll craft pieces that are as durable as they are beautiful.So, take your time, embrace the process, and savor the satisfaction of creating something you’re proud to display. The care you invest now will ensure your finished piece stands out as a testament to your craftsmanship for years to come.

